Uni Erfurt Cloud
The service is generally available to all employees of the University of Erfurt. You then have various options for using the cloud storage service:
- Using the web interface
The easiest and quickest way to use the service is to access it via any internet browser. To do this, go to the following page: https://cloud.uni-erfurt.de
On this page you can log in with your university login, manage your files and make settings for your cloud account. - Use on work devices with client
If you want to use the service on a work device, you can use the client for Windows. You can request this from the University Computer and Media Centre (URMZ), stating the inventory number. It is then installed on your device via the central software distribution. - Use on private devices with client
You can use the service on your private devices. To do this, you must install the appropriate client or app. Sources of supply are the web interface or alternatively the manufacturer's website.
Access via the web interface
General
You can access the web interface via the URL https://cloud.uni-erfurt.de. Log in there with your university login.
On this page you can make settings, manage your uploaded files, create new folders, create text files and upload new files.
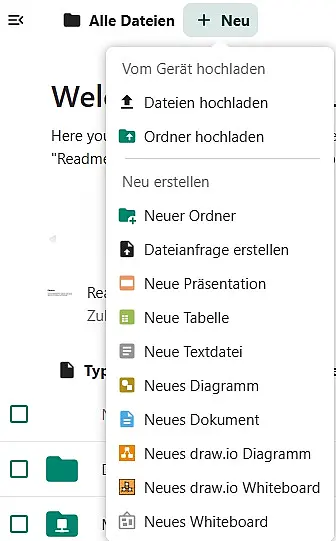
To save files in your cloud, click on the + at the top and then on "Upload files". Now select the file to upload and click Open.
To create a folder, click on the + at the top and then on "New folder". Now write the name of the new folder in the bar and press the Enter key. The new folder will then appear in the overview.
To create a simple text file, click on the + at the top and then on "New text file". Give the text file a name and press the Enter button. The text file will then appear in the overview.
Sharing files and folders
To share a folder or file with another person, tick the file or folder and then click on the 3 dots on the right, on the"Open details" tab and on the"Share" tab at the top right.
Enter the email address of the person who should have access to your file or folder in the "Share with accounts and teams" field. Use the auto-complete function to ensure that the email address is correct and that the target person also uses the service.
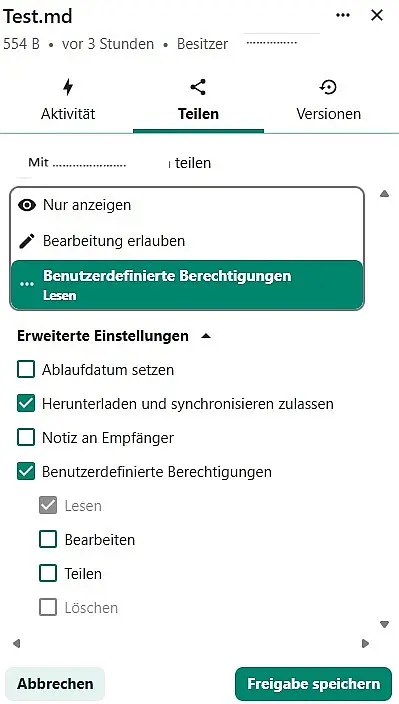
Once the user has been found via the e-mail address, you can assign certain rights to the user. Every user listed there automatically has the right to read this file. Further rights must first be assigned:
- "Advanced settings"
- If "Set expiry date" is ticked, sharing is valid until a certain date
- "User-defined authorisations"
- "Read" default setting
- "Edit" gives him the right to edit files
- "Share" gives him the right to share files
- "Delete" greyed out, as no authorisation for the shared user
Share via link
You can also make files and folders in your cloud available to other people without access to the Nextcloud service via a link (similar to Gigamove).
To do this, tick the file or folder and then click on the 3 dots on the right, via the"Open details" tab, at the top right on the"Share" tab and"External shares".
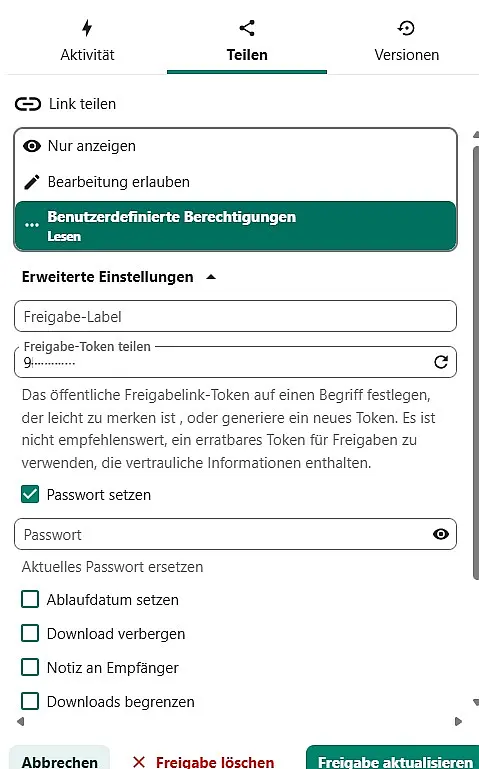
The cloud service then generates a link which you can give certain properties:
- With"Password protection", you give the share a password that the user of this link must enter when using it
- With"Allow editing" you give the user the right to edit the file or folder
- With"Set an expiry date" you can assign an expiry date to the share. This means that the link can only be used until the specified date
You can then copy the link and send it to the target persons by e-mail.
Shared content
In the menu on the left-hand side under"Sharing" you will find the items"Shared with you","Shared with others" and "Shared via a link".
Under "Shared with you" you will see all files and folders that have been shared with you by other users. You can manage all files and folders made available to you there.
Under "Shared with others" you will see all files and folders that you have shared with other users. You can manage all files and folders made available there and change user rights if necessary.
Under "Shared via a link", you can see all files and folders that you have shared with other users via a link. You can manage these files and folders there and change user rights if necessary.
Transcription service
The transcription service is now available in the University of Erfurt Cloud.
This service can be used, for example, to transcribe audio files as accurately as possible.
To use it, upload the relevant file, select it, and choose "Transcribe" from the options menu (three dots on the right). Even if the transcription is immediately displayed as complete, it may still take some time. After successful conversion, additional files (*.status.txt and *.docx) should be created automatically.
Wastepaper basket
In the menu at the bottom left you will find the item"Deleted files". You can restore deleted files there. The contents of the recycle bin are permanently deleted after a certain period of time. After this time, it is no longer possible to restore them.
The recycle bin is part of your storage volume. When deleting large files, it may be necessary to empty the recycle bin in order to free up storage space.
Access via the client
General
The desktop clients offer you the option of uploading files and folders directly to the cloud via a file manager. When started, the client synchronises changes from the cloud to your end device or from the end device to the cloud. You can drag and drop files and folders into the cloud without having to log in via the web interface first.
Installation of the client
If you would like to use the client on a service device, write an email to University Computer and Media Centre (URMZ) and request the installation of the Nextcloud client, stating the inventory number. This will then be installed on your service device via the central software distribution.
If you want to use the client on a private device, you must download and run the appropriate installer via the web interface or via the manufacturer's website .
The configuration is basically identical for both variants.
Configuration of the client
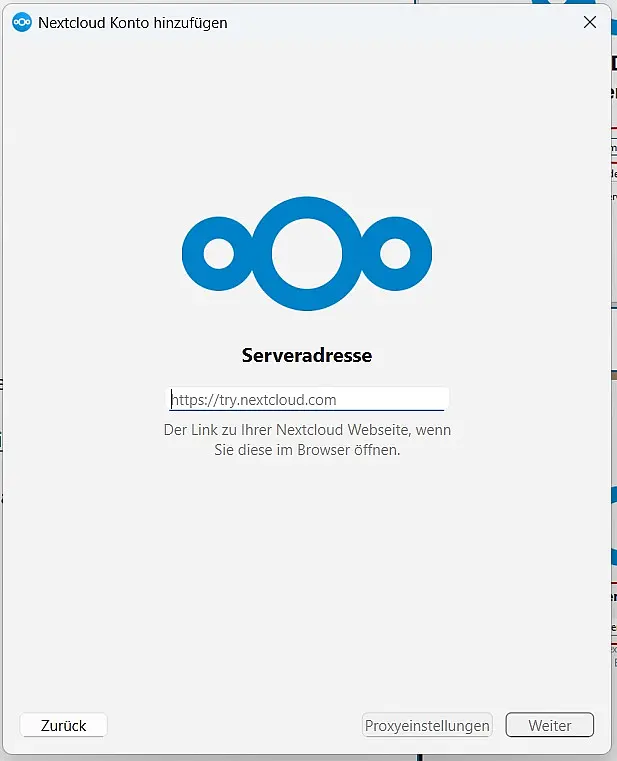
At the end of the installation or when the client is started for the first time, the connection wizard for configuring the client opens. To access your cloud, you must first enter the server address where the cloud server can be reached.
Go to"Log in" and enter the address "https://cloud.uni-erfurt.de" and then click on"Next".
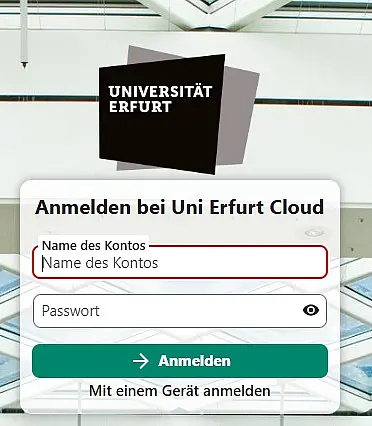
A new browser window will now open. Click on "Login" there. In the next step, enter your university account details under"User name" and"Password" (the same details as for your PC login). For private devices, you must also enter your university account details, not those of your private device! The password is stored in encrypted form in your user profile and does not have to be entered every time you log in.
Go to"Login" and"Grant access"
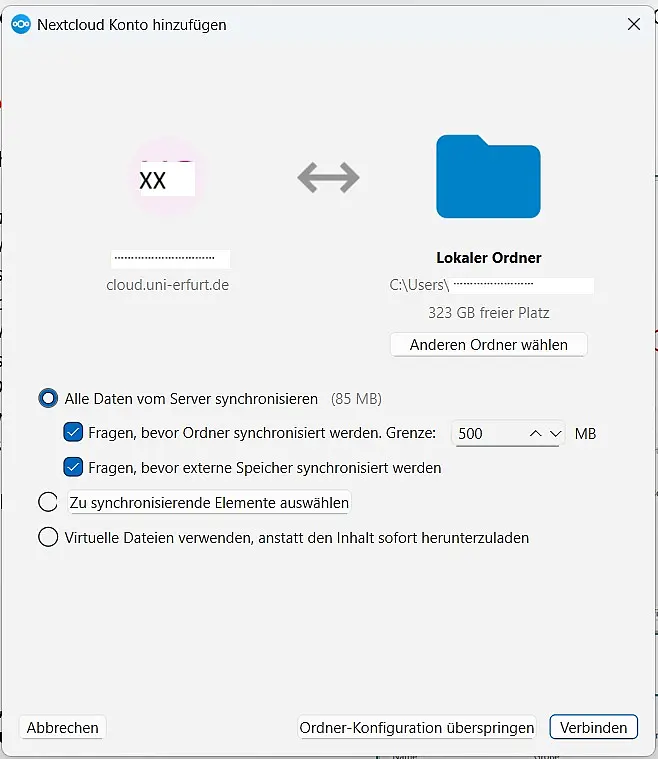
The next step is to make the settings for the cloud folder. You can use this item to set how the client should update or synchronise the files. You can specify the path to the local folder for your cloud data via"Local folder". We recommend leaving the settings as they are.
Then go to"Connect"
The client now establishes a connection to the cloud server and creates the local cloud folder on your device.
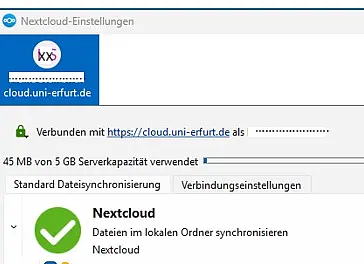
After successful configuration, you can close the window and use Nextcloud.
Local folder
Once you have successfully installed and configured the client, the"Nextcloud" folder will appear in Explorer under Favourites (Windows) or in your personal folder. An icon for Nextcloud is displayed in the task list.
The local folder is regularly synchronised with the cloud server. You can therefore edit, add or delete files and folders there. Every change is also made in your cloud. In particular, if you delete a file or folder, it will also be deleted on the server.
If you want to share a file or folder with another person, right-click on the file or folder in your local folder and then go to"Sharing options" via"Nextcloud". Enter the email address of the person to whom the data should be made accessible and specify the desired properties for sharing.
The settings for sharing via the client are similar to the options in the web interface.
To restore deleted data, you must log in via the web interface and restore the data from the recycle bin there.
![[Translate to English:] facebook icon](/fileadmin/SocialMediaIcons/iconfinder_06-facebook_white.svg)
![[Translate to English:] instagram icon](/fileadmin/SocialMediaIcons/iconfinder_38-instagram_white.svg)
![[Translate to English:] YouTube icon](/fileadmin/SocialMediaIcons/iconfinder_18-youtube_white.svg)
![[Translate to English:] xing icon](/fileadmin/SocialMediaIcons/iconfinder_xing_white.svg)